How to use the ISVapp Feature Management
Table of contents
- Creating or Updating Features
- Mapping of ISVapp Feature Definitions to Salesforce AppAnalytics events
- Feature Components
- Refined Custom Object Filters
- Applied Event Filters
- Using Feature Taxonomies
- Example Scenario
- Enabling Taxonomies
- Creating Your First Feature Taxonomy
- Using the Feature Taxonomy
- Best Practices for Rolling Out Feature Taxonomies
The Feature Management module is one of the central components in ISVapp. It allows ISV and OEM partners to map out components (Custom Objects, Lightning Components, Apex Operations etc.) from managed packages into meaningful features.
Creating or Updating Features
Note: you need to have admin permissions within ISVapp to create and modify features. Your ISVapp account owner can grant you these permissions under Setup > User Management.
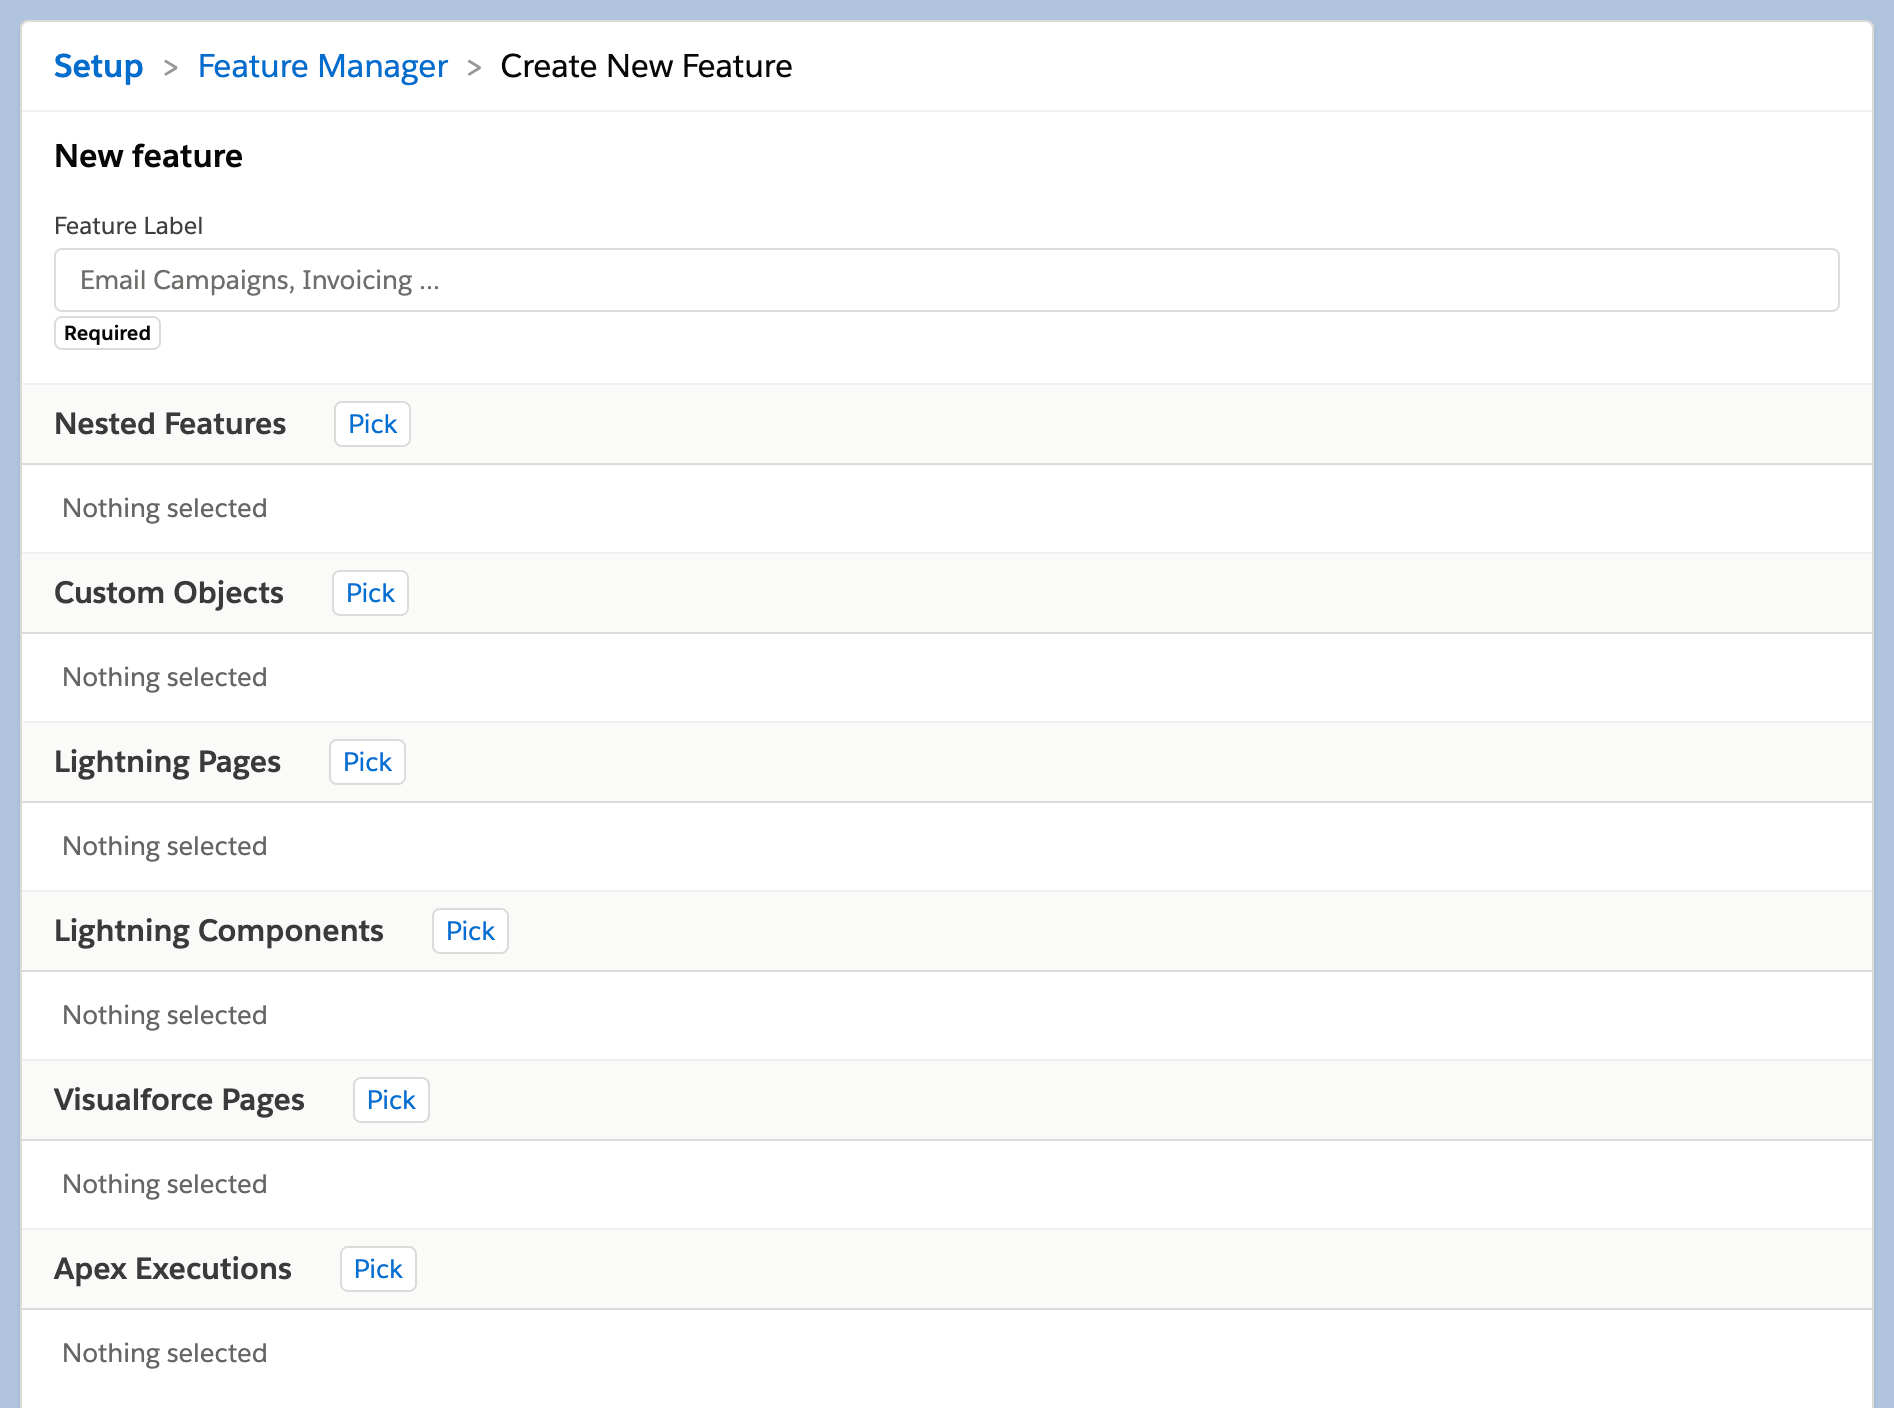
Creating or updating features in ISVapp is straight forward. Navigate to Setup > Feature Management > Define a New Feature to get started. When configuring features, you can choose from a set of available component types.
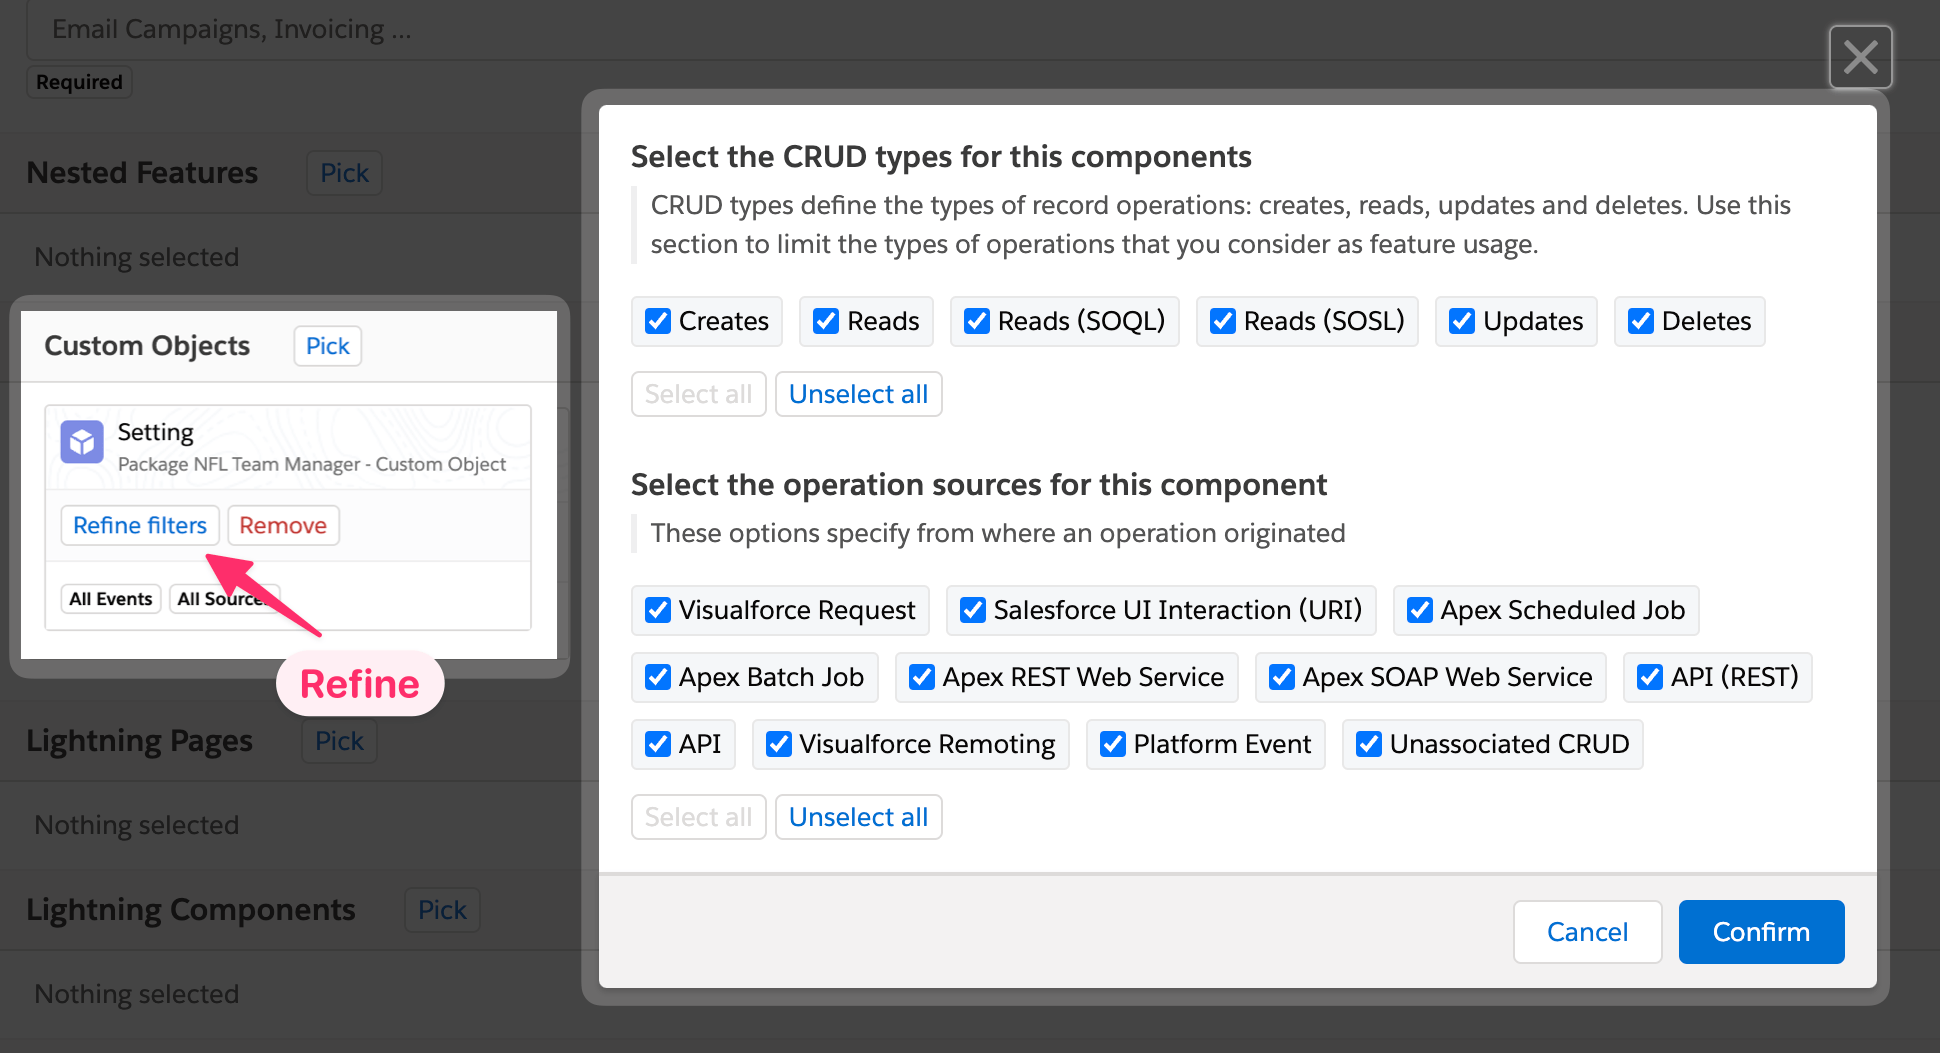
Additionally, after adding a custom object component to a feature, you can go ahead and further include or exclude specific operation and log record types:
After creating or updating a feature, ISVapp will automatically calculate or recalculate its usage data. It will also update historical usage data, ensuring that the feature chart accurately reflects the feature's definition across the entire timeframe.
The recalculation usually completes within 24 hours and is indicated by the "Recalculation pending" badge. During this period, data for certain months may temporarily disappear.
Mapping of ISVapp Feature Definitions to Salesforce AppAnalytics events
Feature Components
The table below illustrates how ISVapp feature components map to the underlying raw data custom entity types provided by the Salesforce AppAnalytics API:
ISVapp Feature Component Type | Raw Data Custom Entity Type |
|---|---|
Custom Objects | CustomObject |
Lightning Pages | LightningPage |
Lightning Components | LightningComponent |
Visualforce Pages | VisualforcePage |
Apex Executions | ApexClass and ApexTrigger |
Refined Custom Object Filters
ISVapp in-app CRUD (Create, Read, Update, Delete) types map to the following operation types:
ISVapp CRUD Type | Raw Data Operation Type |
|---|---|
Creates | INSERT |
Reads | READ |
Read (SOQL) | SOQL_QUERY |
Read (SOSL) | SOSL_QUERY |
Updates | UPDATE |
Delete | DELETE |
Log Record Type Mapping
ISVapp in-app operation sources map to the following log record types:
ISVapp Operation Source | Raw Data Log Record Type |
|---|---|
Apex Execution | ApexExecution |
Apex REST Web Service | ApexRestApi |
Apex SOAP Web Service | ApexSoap |
API | API |
Bulk API (v1) | BulkApiV1 |
Bulk API (v2) | BulkApiV2 |
Apex Scheduled Job | CronJob |
Platform Event | PlatformEventConsumer |
Apex Batch Job | QueuedExec |
API (REST) | RestApi |
Unassociated CRUD | UnassociatedCRUD |
Salesforce UI Interaction (URI) | URI |
Visualforce Remoting | VFRemoting |
Visualforce Request | VisualforceRequest |
Lightning Page View | LightningPageView |
Lightning Interaction | LightningInteraction |
Applied Event Filters
ISVapp applies a set of default filters that help you to get more precise usage numbers. Currently the following events are being excluded for all engagement and feature usage calculations:
Events from tests
Events for non-existent Visualforce pages
Events without subscriber organization
Using Feature Taxonomies
If you have a comprehensive application, multiple managed packages, or simply a high number of features, consider setting up a feature taxonomy. This allows you to define a hierarchy for organizing your feature definitions.
This capability was introduced in June, 2024 (you can read the announcement blog post here).
Example Scenario
Consider an ISV/OEM partner with two managed packages on the Salesforce AppExchange, each representing a separate product. Both are already tracked in ISVapp, and their essential features are mapped out using the above approach.
A good initial taxonomy could define two hierarchy levels:
Product (either Package A or Package B)
Product Area (parts within each product, spanning across multiple features)
Enabling Taxonomies
First, enable Feature Taxonomies by navigating to Setup > Appearance > Enable Taxonomies.
Creating Your First Feature Taxonomy
To create the example taxonomy mentioned above, go to Setup > Feature Taxonomies and follow the wizard. Within the hierarchy modal, create two hierarchy levels: Product and Product Area. Once the hierarchy is set up, you can create the actual products, product areas, and the features they include. The taxonomy wizard will guide you through this process.
Using the Feature Taxonomy
After setting up your taxonomy, the user interface under Product Insights > Features will change slightly. You will notice a tree navigation on the left, allowing you to view usage data for each level of your product hierarchy.
Best Practices for Rolling Out Feature Taxonomies
To use feature taxonomies without confusing your colleagues during the setup, follow these steps:
Create a temporary user group under Setup > User Groups for yourself or the team working on the taxonomy creation.
Assign yourself to that user group under Setup > Users.
Within the newly created user group, enable the taxonomy setting.
By following this approach, you can control who sees the taxonomies during the setup. Once you are ready, go to Setup > Appearance and enable the taxonomy setting for all users.